Get started in Fly Tying
You should tie your own flies they said. You will save some money they said… Well, if you tie your own flies you know that that isn’t necessarily the case, but looking back do I wish I would have just bought all of my flies instead? Not for a second. Some days, sitting down at the vice and clearing my mind is all I want to do. Just like fishing, it is a type of meditation—relaxing and satisfying. Also, just like fly fishing, fly tying has a somewhat steep learning curve. There are new terms to learn as well as new techniques to master. But once you get started, you will love sitting at the vice and whipping up a couple of standard patterns, or that new experimental fly that you are sure will fool that giant fish that no one else has been able to catch. So, if you are getting started tying flies or even if you have tied for a while, hopefully, some of these tips will help you and will make tying more enjoyable.
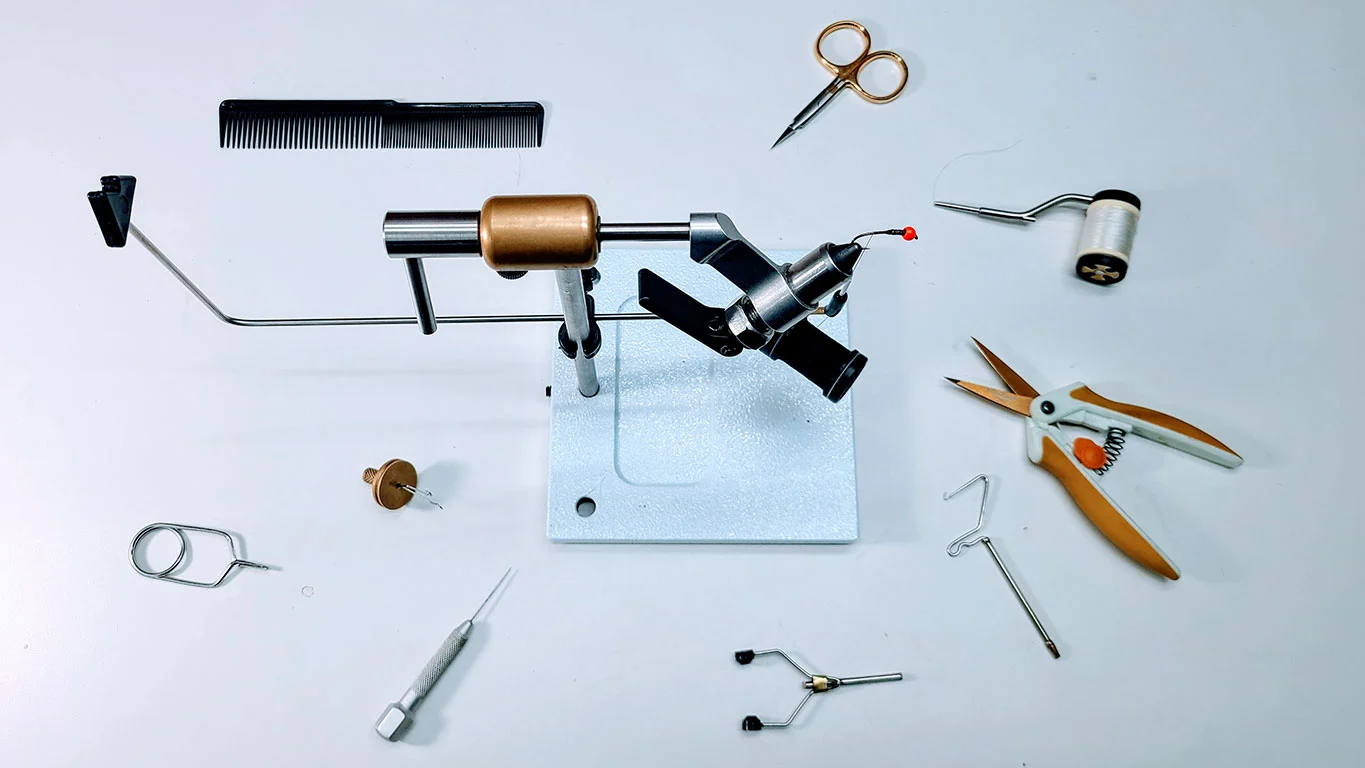
1. Invest in the tools you use the most
Recommending tying tools can be difficult since the ones you use most depend greatly on the types of flies you use. However, it doesn’t matter if you are tying size #20 zebra midges for trout, or double #4/0 articulated musky flies you will want to invest in these four important tools that you will use every time; a vice, a bobbin, scissors, and a whip-finishing tool.
Vice: Yes, you can tie flies on nearly any vice with basic tying tools, but you will use your vice for every single fly you tie. Getting one that fits your budget, your tying style, and has the features that will make you tie better flies makes the entire process so much more fun. There are tons of different vices out there ranging from twenty to thirty bucks to hundreds. I first started tying on a super cheap vice that included few tools. Was it fun to use? No. Did it hold my hooks in place? Not really. But eventually, I upgraded and would never think of going back. Your perfect vice may depend on your fly tying setup, the type of flies you tie, and if you want to be able to travel with it to tie flies on the road. I’m currently tying on a Peak Rotary Vice and would recommend it for almost any new or seasoned tyer.
Bobbin: I started out with an extremely cheap bobbin that wasn’t completely smooth on the inside that would cut my thread constantly. I’m a little surprised that I still tie flies after how many frustrating times my thread broke when I first started tying. After going through a few different types of bobbins now, I would suggest not skimping on your thread bobbin. If your thread is breaking often then you may have an issue with your bobbin, or you could be using too light of thread, or you may be using too much tension.
Scissors: There are many different options when it comes to fly tying scissors. I personally don’t like the tiny finger holes on fly tying scissors (or hemostats) and prefer to use Fiskars micro-tip scissors for my flies.
Whip-finishing tool: You can whip-finish a fly (a technique of tying a knot on your hook to keep it from unraveling) without a specialized whip-finishing tool, and you don’t need to get anything fancy, but I do prefer to use them and they are generally cheap enough that I would still recommend getting one if you don’t have one already.
2. Some extra helpful tools
After you have those main tools, you can start looking into extra tools and niche tools that will help you tie specific patterns. If you want to tie larger bass and pike flies, you may want to look into getting a hair stacker and a hair packer. They will both make tying large deer hair poppers and divers much easier. If you primarily plan on tying trout flies, then having a pair of hackle pliers should be next on your list. Bodkins are basically just a needle with a larger handle, but they come in handy for many different fly patterns. You can use them to pick out your material to look more buggy, clear the eye of your hook, or even apply head-cement. A dubbing spinner is also one of my favorite tools for tying many different bass, steelhead, and trout patterns.
3. Use some household tools you may already own.
Instead of a fly-tying-specific material keeper, I like to use small plastic hair ties to clip my materials to my vice when I tie streamers. Also, when tying streamers, I like to use a regular plastic comb instead of a bodkin to detangle materials. Once you are finished tying your fly, you can use general household super glue to keep it from falling apart (Zap-a-Gap is my preferred option).
4. Avoid the tools you don’t need.
There may be a time and place for some of these tools, but they are often only used if you tie professionally or tie very specific types of flies. These tools include foam body cutters, curved scissors, bobbin threaders, tweezers, thread splitters, fly-tying combs, material clips, and extended body twisters.
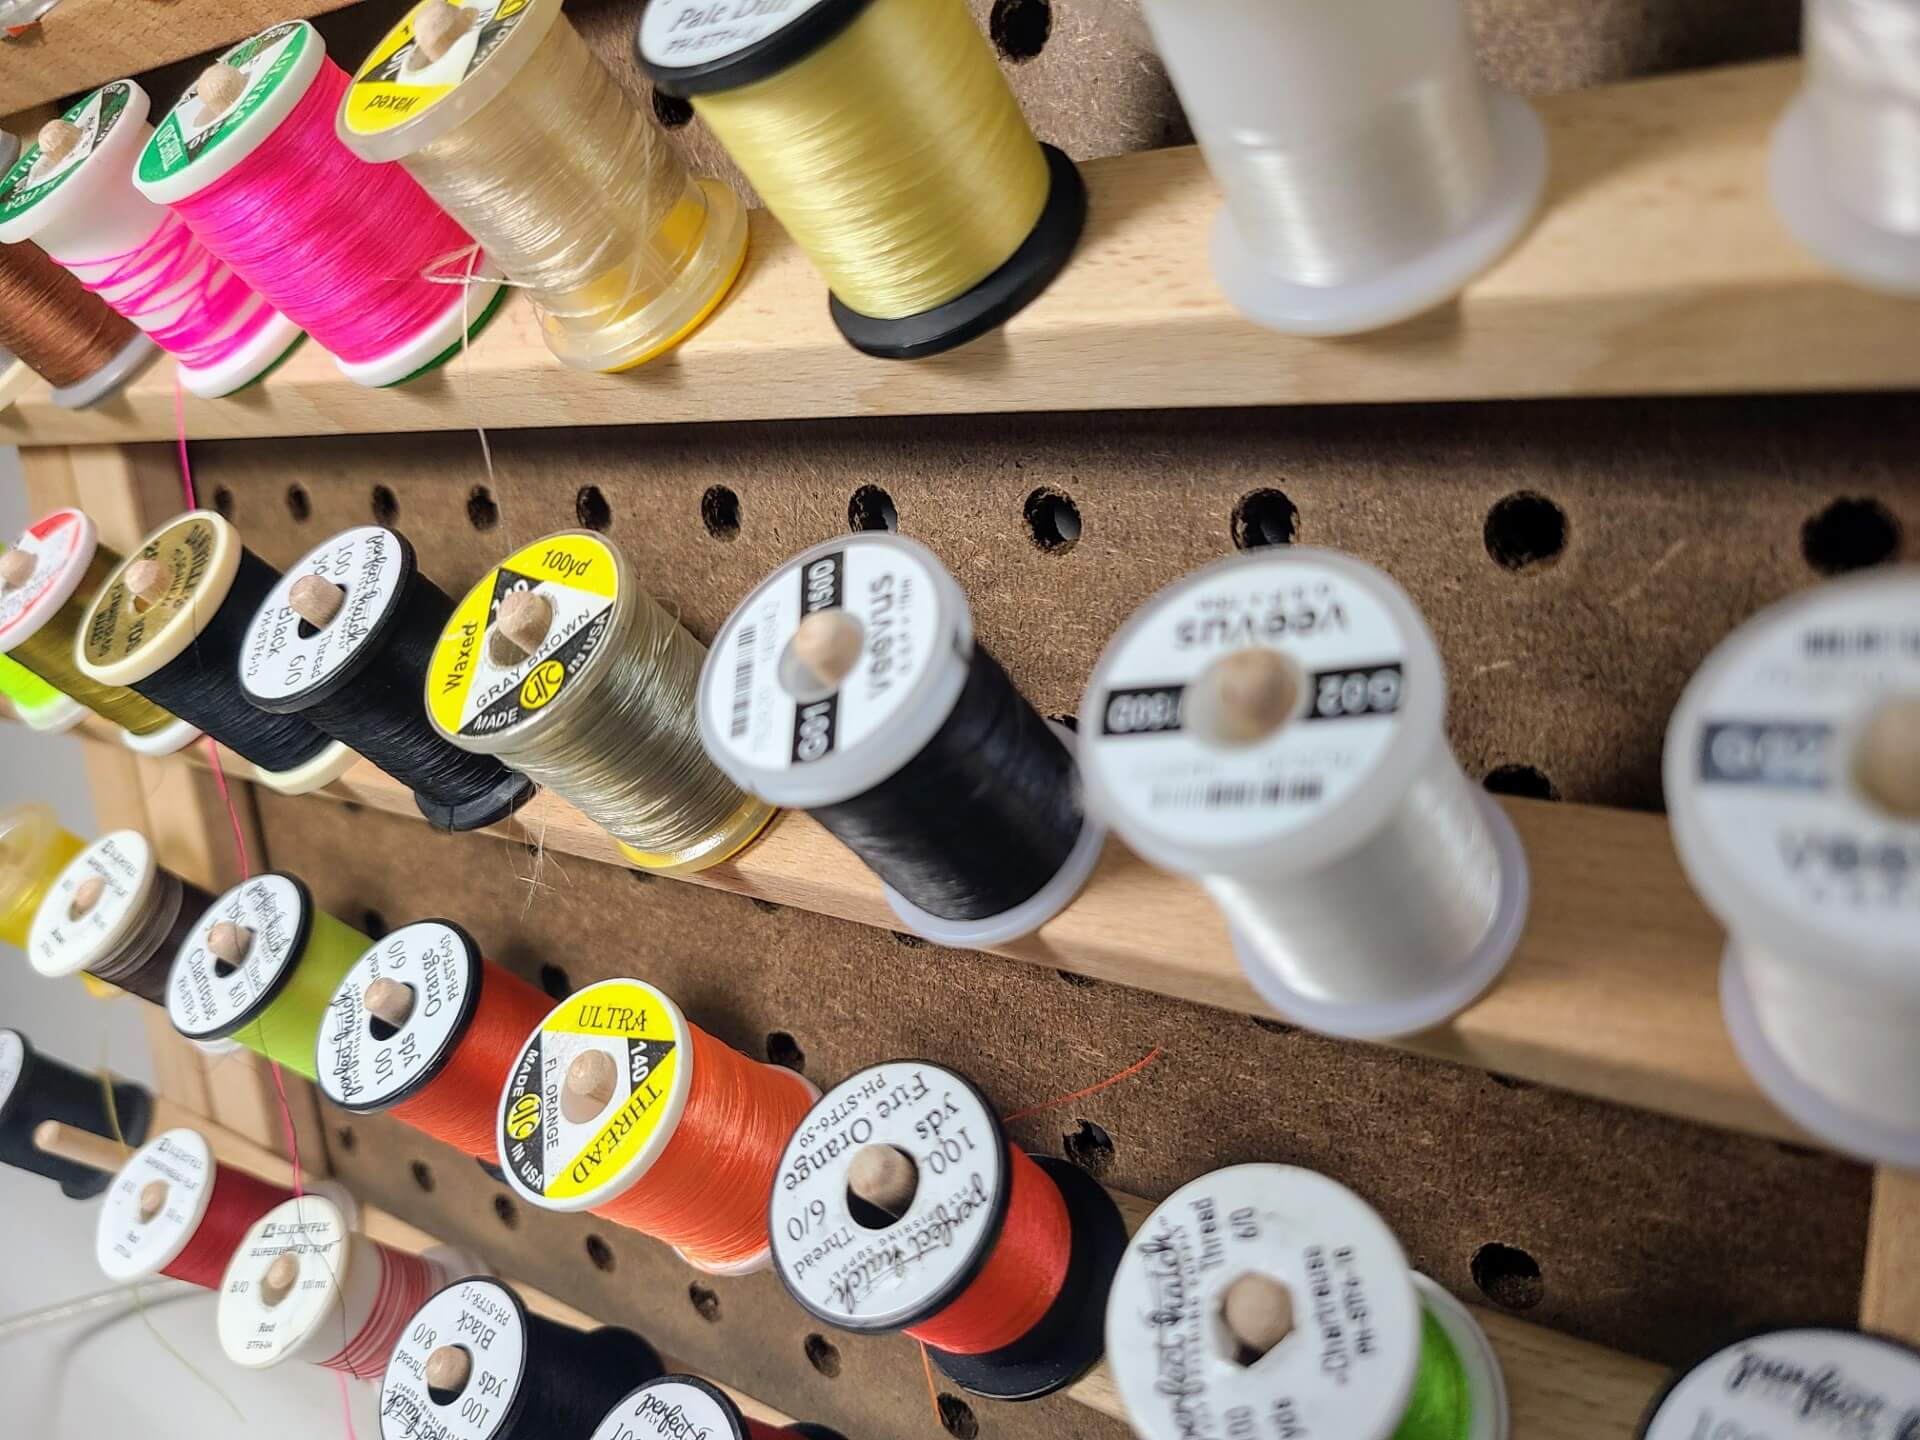
5. Not all threads are the same.
Just like with tippet, figuring out the different thread sizes to use can be tricky. Many threads are measured in denier, which is basically the number of strands in each thread. If you are tying small trout flies, you will primarily want 70D or smaller. Medium-sized streamers are best tied with 140D, and larger bass and pike flies are easier to tie with 210D. Using 210 denier thread on average nymphs will be too bulky and can lead to problems like crowding your hook eye (more on that later). You may also see threads in sizes like 6/0 and 8/0. Threads in those sizes get smaller as the numbers increase, so 6/0 thread works well on medium-sized nymphs and 8/0 is ideal for hooks 14 and smaller.
6. Keep even and consistent thread pressure.
Keeping even thread tension is something you’ll just need to practice. The tension needed will also change depending on the strength of your thread, which means you can and should use more tension when using thicker thread. Once you have figured out that pressure, it is important to keep it even throughout your entire fly. Some bobbins allow you to dial in the tension on the thread, which can be extremely helpful.
You should also keep in mind that the material you tie to your hook will naturally want to rotate around the hook in the same direction as you are tying. So when tying material on the top of your fly, you may need to bias it slightly towards you, as the thread pressure will slightly pull the material in the same direction you are wrapping.
7. Spin your bobbin.
Spinning your bobbin counterclockwise will flatten out your thread. This can be helpful when tying small thread-bodied flies for an even uniform look. Spinning your bobbin counterclockwise will also help you catch material to tie onto your hook as it makes the thread naturally want to pull towards the back of the hook. You can also spin your bobbin clockwise to “cord up” your thread. This technique can be helpful to build thread bumps on your hook to keep your materials from sliding up or down the hook.
8. Be consistent.
I’ll admit I get pretty distracted when I’m tying flies. I’ll tie one fly, then think “wouldn’t this be better if I added _____?” Then every fly ends up being a little different. There is nothing wrong with that style of tying, but if you want to become a better and more consistent tyer, you should do what Paul Johnson recommends: tie at least 6 identical flies every time you sit down to tie.
9. Experiment
I know, I know—I just said to be consistent, but there really are no rules in fly tying. That’s most of the fun. Try something different, use a new material, combine your favorite parts of your favorite patterns. There is a level of enjoyment with catching a fish on a fly that you tied, but catching one on a fly that you designed and tied is even more rewarding. Once you have dialed in a new pattern, you can work on consistency.
10. Don’t crowd the hook eye!
It’s like John Mulaney’s joke about writing “happy birthday” on a banner. You get “happy birt” down and realize you don’t have any room left, so you end up writing “hday” in tiny, crooked, unreadable letters at the end. Just like writing a banner, you will often become overconfident and think to yourself, “I have plenty of room left,” only to end up right at the eye without even starting on the head or thorax. You’ll thank me when you are on the water and only have half of a #16 hook eye left to get your tippet through!
My Favorite Fly Tying Tools
- Vice: Peak Rotary Fly Tying Vise - Fly Tying
- Bobbin: Rite Bobbin Merco Products Fly Tying
- Dubbing Twister: Dr. Slick Dubbing Twister
- Scissors: Fiskars Titanium Micro-Tip Easy Action Scissors
- Hair Stacker: Dr. Slick Hair Stacker Brass Finish
- Hackle Plier: Loon Outdoors Ergo Hackle Plier
- Glue: Brush on Zap a Gap
- Whip Finisher: Whip Finisher
- Tool Holder: High Density Foam Fly Tying Vise Tool Holder
- Bodkin: Dr. Slick Bodkin
JS-Outdoors is a participant in the Amazon Services LLC Associates Program, an affiliate advertising program designed to provide a means for sites to earn advertising fees by advertising and linking to Amazon.com.
Share with a friend!
js-outdoors is a free resource for all.
Please consinder donating to keep this site ad-free!

![How To Tie An Intruder [video]](/images/how-to-tie-an-intruder.jpg)
![Steelhead In The Snow [video]](/images/steelhead-in-the-snow.jpg)