North Shore Steelheading Techniques [Complete Guide]
Do you want to learn the most effective techniques used to catch steelhead on the fly? This article will cover all of the most popular fly fishing techniques as well as the best conditions to use each one. It mainly covers tributaries on the north shore of Lake Superior, but also rivers like the Brule in Wisconsin, and many other Great Lakes Tributaries. By the end of this article you will have learned the following:
- Multiple nymphing and swinging techniques.
- How to rig your flies for each technique.
- How to choose which technique to use for different water conditions.
- A few tips to make you more efficient on the water.
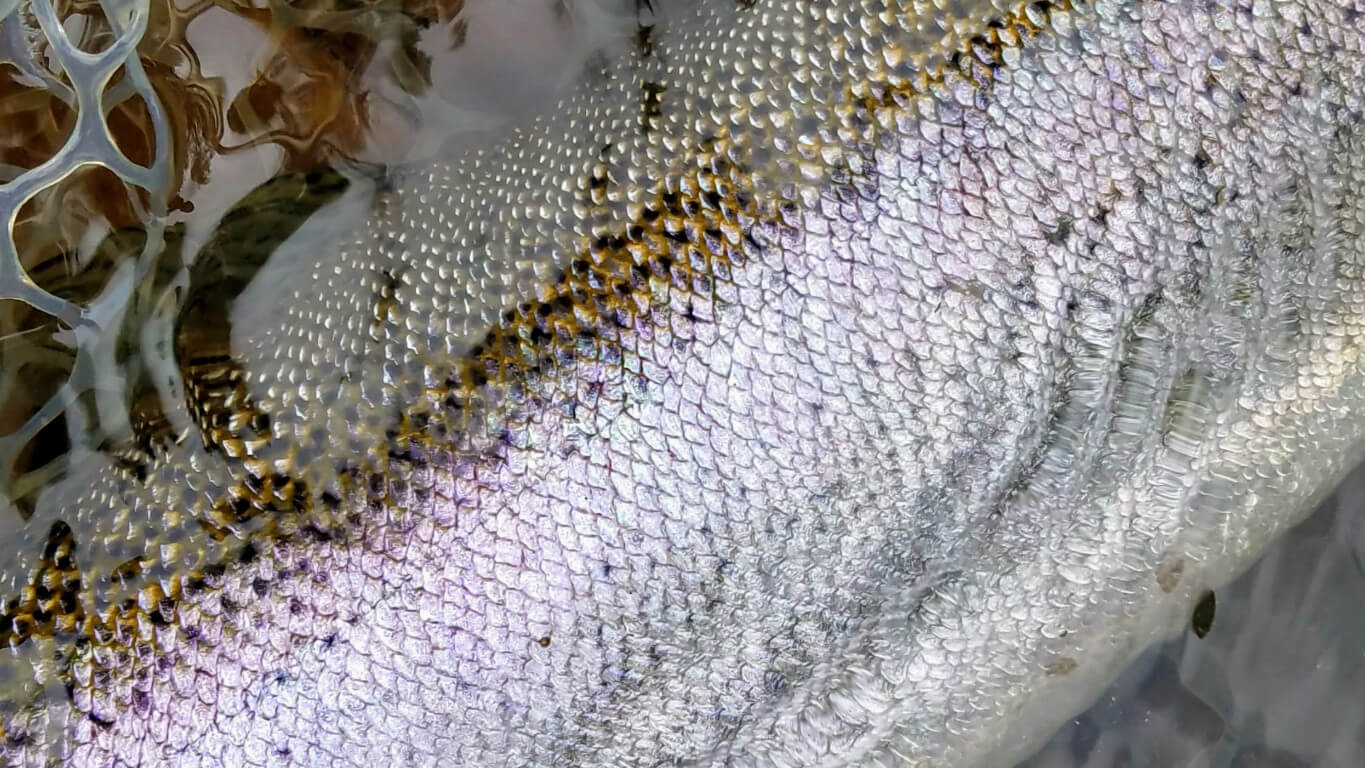
Steelhead, the fish of 1,000 casts... Make sure each of them counts!
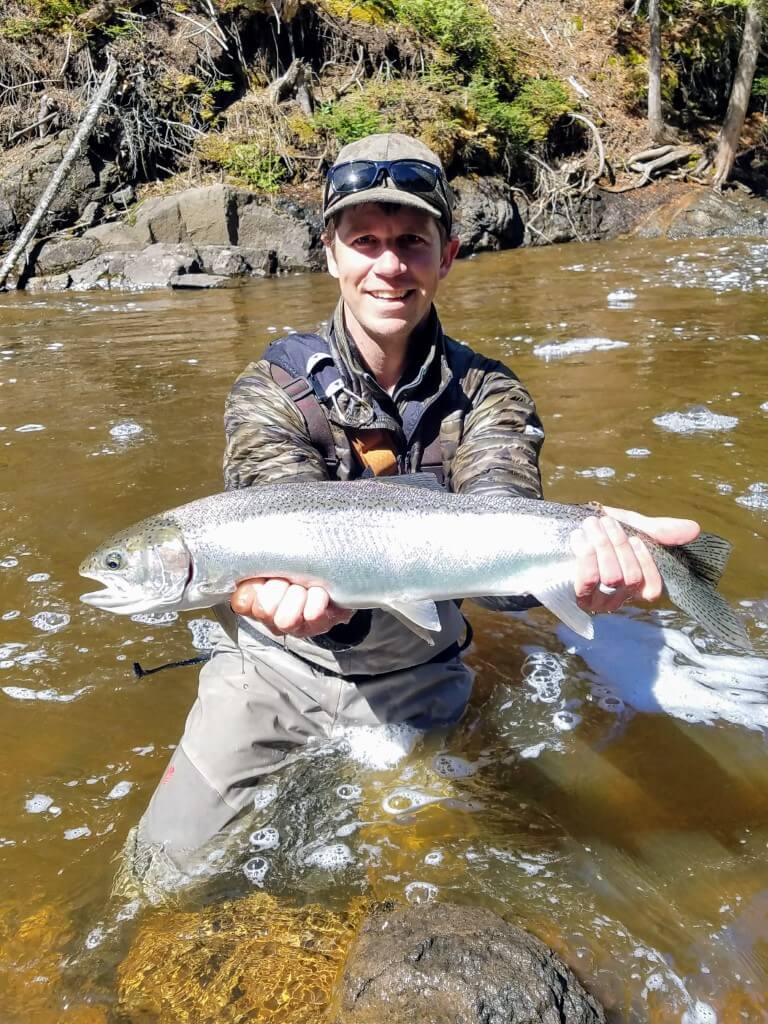
When I first started steelheading it was crazy to think that you could tie on a fly or colorful ball of yarn the size of your fingernail, toss it into a muddy, fast-moving river, and somehow catch a steelhead. It took me an entire season to get my first steelhead on the fly and looking back at my flies and the techniques I was using, it was no wonder I didn’t catch any. Skip the learning curve and use these proven techniques to catch more steelhead!
Why Learn A New Steelheading Technique?
The main reason for needing an arsenal of steelheading techniques is because the water (especially on the north shore of Lake Superior) is constantly changing. During the early spring season, the water will be fast and muddy with all of the snow melting and by the end of the spring season, the water will be low, slow, and clear. To be able to fish in rivers with a range of width, speed, water clarity, depth, as well as depth and current complexity requires you to be a dynamic angler. Below are the types of techniques that will allow you to catch fish no matter the condition! If you want to read a specific section, you can click on the links below to jump to that specific section.
- Basic Rigging ↴
- Nymphing Techniques ↴
- Tight Line Nymphing ↴
- Chuck-n-Duck
- Drop-Shot
- Inline Split Shot
- Slinky Rig
- Euro Nymphing
- Chuck-n-Duck
- Suspension Nymphing ↴
- Horizontal Indicator
- Vertical Indicator
- Tight Line Nymphing ↴
- Streamer Fishing ↴
- Swinging Streamers
- Stripping Streamers
Basic Rigging (The Foundation)
I’ll assume you already have a fly rod and reel, but if you don’t, or you have questions about gear selection check, then check out my recent article on the fly fishing gear for Lake Superior steelhead, and my list of fly fishing accessories for under $20.
Each of these techniques starts out with the same or at least a very similar rigging foundation. This is especially important when you want to adapt to the ever-changing water conditions without bringing 6 rods with you. Rigging your reel to easily switch between tight-line, indicator nymphing, and swinging can save you time and allow you to fish in any type of water including; pools, buckets, tail-outs, and riffles.
I typically start out with 20lb of backing to fill the reel and allow to faster retrieval of my fly line. I will then either use fly line, running line, or monofilament. Most of the time I use fly line, but pack an extra spool loaded up with running line. Using monofilament or running line will allow you to fish with more sensitivity and less drag, but fly line lets you fish larger rivers and is easier to handle in cold weather. Each of these three lines choices have there pros and cons, but they all will work for each type of technique I’m going to cover in this article. Whatever line you choose the rigging formula from the leader down to the flies will stay the same.
Three Line Options
Fly Line
- 20lb Dacron Backing - Weight Forward Fly Line - 4’ 20lb monofilament - 4’ 15lb Fluorocarbon - Swivel/Tippet Ring
Running Line
- 20lb Dacron Backing - 40lb Running Line - 4’ 20lb Monofilament - 4’ 15lb Fluorocarbon - Swivel/Tippet Ring
Monofilament
- 20lb Dacron Backing - 10lb Monofilament - Swivel/Tippet Ring
Nymphing Techniques
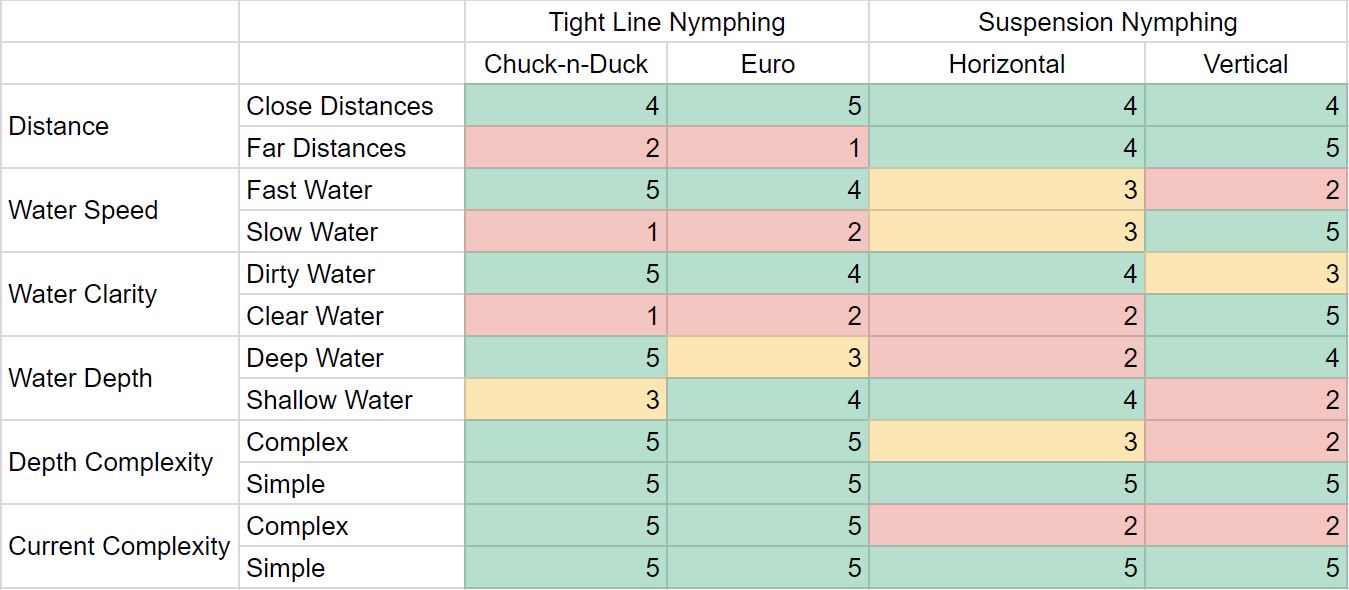
Out of all the different ways to catch steelhead, nymphing is by far the most common and easiest way to catch a steelhead. There are multiple presentations you can use to allow your nymph to get in the right zone and drift in a natural way. The chart below shows a scale from 1 to 5, with 5 being the most ideal condition for each technique.
When Should You Use Each Technique
Tight Line Nymphing
If you are fishing in dirty water and want to be as versatile as possible, tight line nymphing may be your best option. You will want a use sensitive and somewhat lightweight rod for this technique since you are feeling for a fish and not visually watching an indicator.
Chuck-n-Duck
This technique is most beneficial in deep, short runs (very common on the north shore) especially when the water is fast and muddy. However, it is a very versatile technique that you can be used nearly any time of year and in any water condition. Not only does it keep your fly down in the strike-zone longer, but you can fish nearly any water depth without changing any of your rigging, other than adjusting the size or amount of split shot. It is more common to use monofilament or running line for this technique.
The biggest downside to this technique is that it is fairly common to foul hook fish. Snagging fish is not always avoidable, but some anglers use this technique unethically. Try to avoid using this technique if you are sight fishing, and don’t set the hook randomly through your drift hoping to snag fish.
Below are the three different ways to rig your weight for chuck-n-duck nymphing.
Drop Shot (My First Choice)
Dropshotting allows you to change the size and amount of split shot easily, change the length and weight of your leader, and because you aren’t putting split shot directly on your main line, you won’t risk weakening your main line crimping on split-shot.
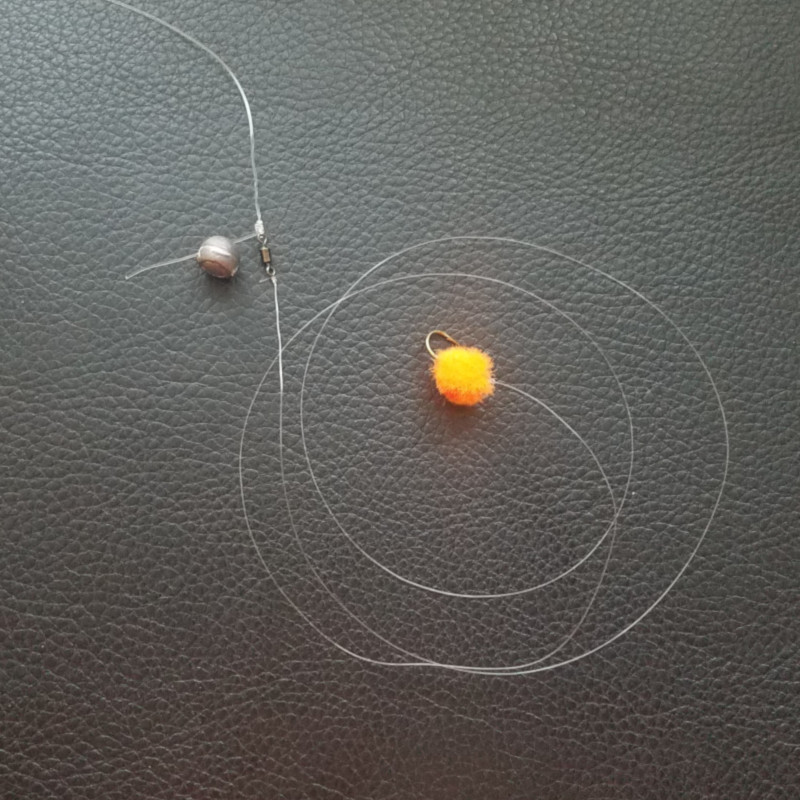
- Rigging: To fish this way you will either need to use a small swivel, tippet ring, or use a line to line knot like the blood knot. You can either use straight monofilament, or tie on a 10-12ft leader of 10-15lb fluorocarbon then attach a swivel or tippet ring. Leave the tag end of your line unclipped and roughly 3-4 inches long. I like to tie a single overhand knot at the end then crimp on my split shot. Then, tie on a section of 6-8lb fluorocarbon tippet roughly 16 inches long to the other end of the swivel or tippet ring and attach your favorite fly or egg pattern. You’ll want to fish a lighter tippet that your main line so if you do get snagged you don’t lose your entire leader.
Inline Split Shot
This way of rigging split shot should really only be used as a last resort. It is the easiest way of adding weight to your line, but because you are crimping directly onto your line and your line will then be running closer to the rocks there is an increased risk of your line becoming damaged. Remember that the pound test line you are using is only as good as strong as its weakest part!
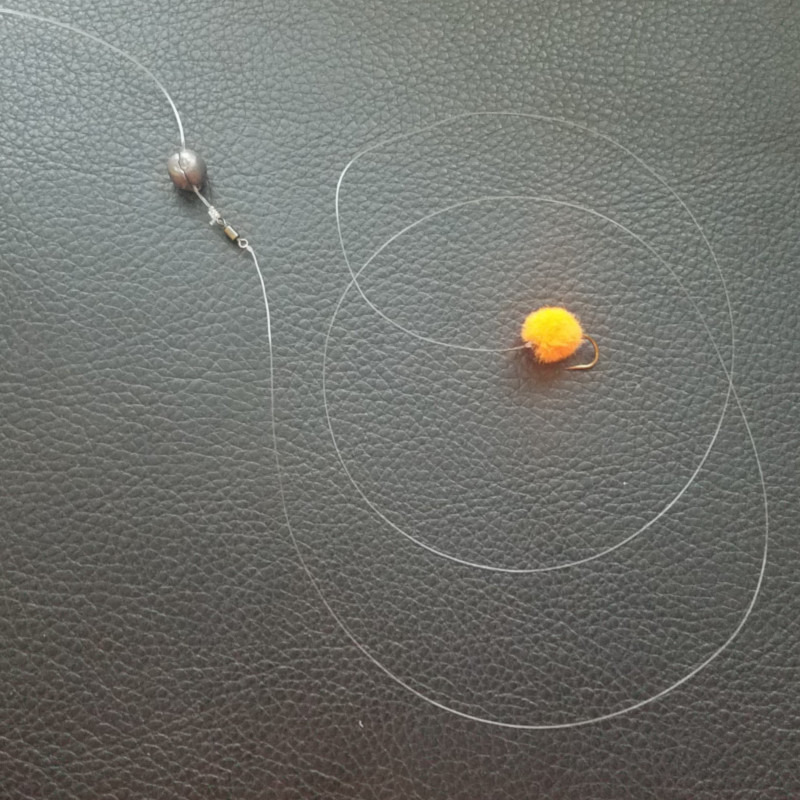
- Rigging: You can tie your fly directly to your leader or mono line and add split shot 1-3 feet up from your fly. I still like to use a swivel and between my monofilament leader and fluorocarbon tippet. The swivel helps with line twist as well as keeping your split shot from sliding down next to your fly giving a poor presentation.
Slinky Rig
The slinky rig is the best way to fish in deep and/or in areas with extra snaggy rocks or tree roots. You can buy these or make them on your own. Minnesota Steelheader has a great guide on how to build your own slinky rigs.
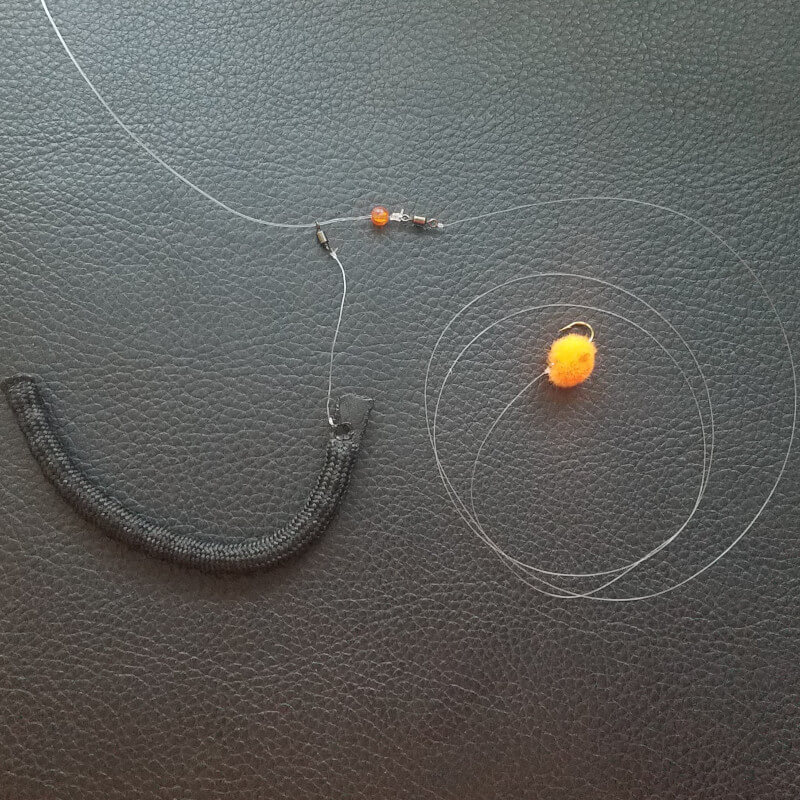
- Rigging: This system is rigged and fished very similarly to the drop shot method. But instead having split shot connected directly to your leader, the slinky rig is tied to a swivel can move freely up and down your leader. This method is great if you are tired of getting your split shot snagged, but it is not as versatile as the drop-shot method since you cannot add and remove weight quickly and easily.
Euro Nymphing
Euro nymphing is really a collection of multiple techniques used in Europe. You can split each technique down even further into Czech, Polish, French, and Spanish nymphing, but for the purpose of keeping this simple, I will just bundle all of them all into the Euro nymphing technique.
This technique is somewhat similar to Chuck-n-Duck fishing but far more elegant. Instead of using split shot to get your nymph or egg pattern to the bottom, you will use a single jig-style tungsten beaded nymph. You can still use split shot if you need to fish really deep, but you need to feel the bite using this technique and split shot will take away the direct connection you have to your fly.
This is an up close and personal technique. To have the best success Euro Nymphing you’ll want a long, sensitive rod to feel the bite, but you can also tie in a section of sighter material into your leader to visually detect a bite. When you toss your fly upstream you will want to keep your rod high and moving slightly in front of your fly keeping a slight bow in your leader. If you feel a sharp tug or see your leader straighten out then set the hook! This technique is better when the water has started to clear up but is not so clear that you cannot get close to the water without spooking fish.
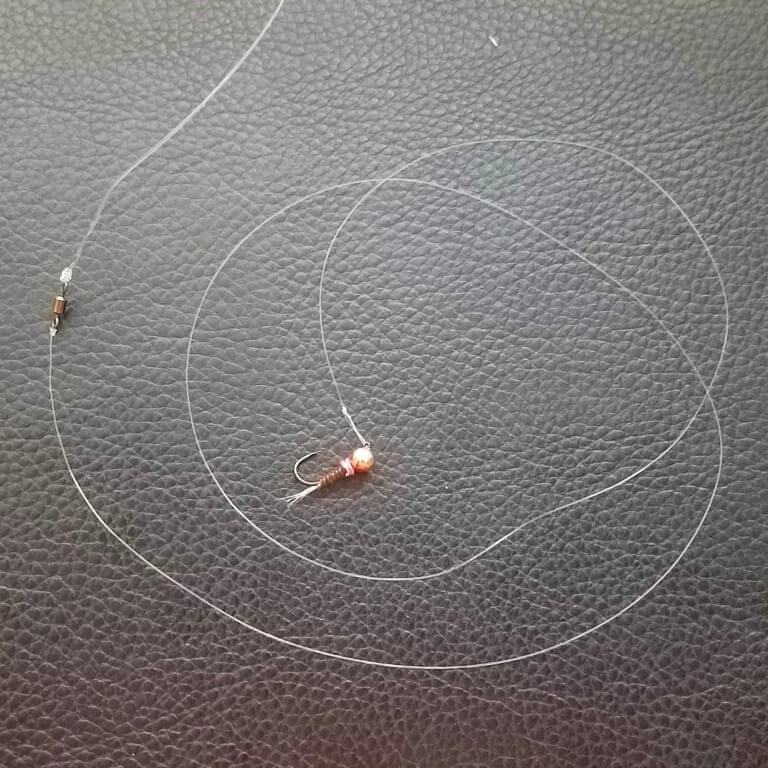
- Rigging: You can either use straight mono, running line, or regular fly line either with all of your fly line extending past your rod guides or use a long enough leader (18ft or more) so that all of your fly line is on your real. If your fly line ends in the middle section of your rod then your fly will unnaturally get pulled through the water. I also like using a non-slip mono loop knot when tying on a jigged nymph because having a knot that is not cinched down onto the eye will not hinder the natural movement of the fly and allow you to use heavier tippet.
Suspension Nymphing
Suspension Nymphing with an indicator can simply be thought of as adding an indicator onto a chuck-n-duck or euro nymphing rig. This allows you to fish further out in pools or runs where you otherwise might not be able to reach. The other benefit of this technique is that indicators are extremely sensitive. It can be difficult especially for a new angler to feel the bite of a fish, but it is pretty easy to tell when you indicator drops.
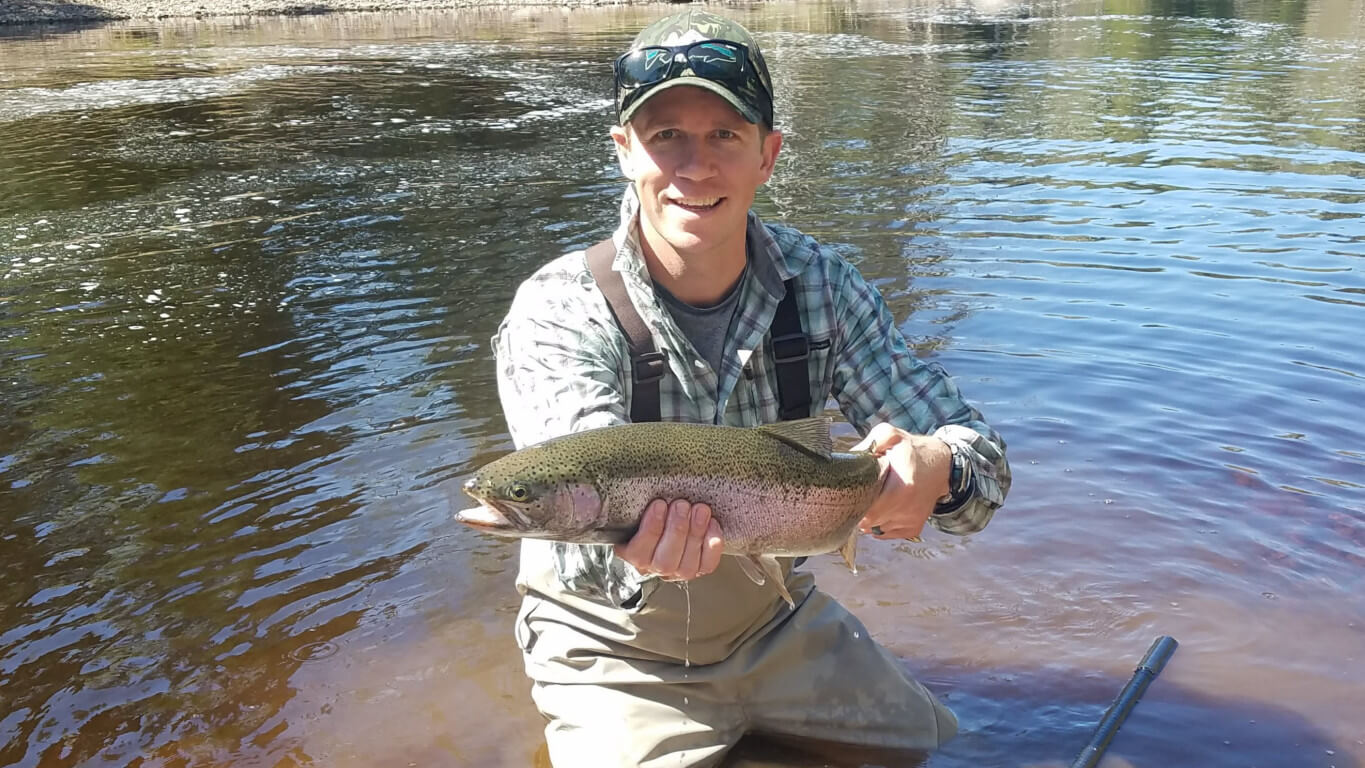
You can use fly line or mono with this technique as well. Although using fly line with this technique is more common. Fishing with fly line will allow you to fish further distances, but if the river has a few different speeds of current it can be difficult to get a good drag free drift.
Horizontal Indicator
To make sure your fly is getting all the way to the bottom you should place your indicator one and a half times the depth of the water that you are fishing in. You should see your indicator move slightly as your split shot is ticking the bottom of the rocks. Every once and a while your indicator will stop or drop because it is snagged on a rock or branch, you should set the hook even if you think its a rock just for the odd chance that it is a fish that took your fly. This technique excels in tailouts (the water at the end of a pool, just before fast water) and when fishing the seams of pools. It is very versatile because you can always take off your indicator and fish the chuck-n-duck method of nymphing without having to re-rig.
This method works best with unweighted flies. Your split shot should lightly bouncing across the bottom at roughly a 45° angle behind your indicator with your fly floating a few inches above the bottom.

- Rigging: Simply add an indicator to your drop shot or inline or chuck-n-duck setup. I prefer using Air-Lock Indicators for this method as it allows you to easily remove it and fish with a tight line or even change to a smaller or larger indicator depending on how heavy your flies and split shot are. My favorite sizes are 1/2” for single flies and 3/4” for multiple fly rigs.
Vertical Indicator
Vertical indicator fishing is taking some of the techniques commonly used by centerpin anglers. You use a strike indicator or float, but instead of having all of your weight bunched together and bouncing on the bottom you evenly distribute your split shot down your line between your indicator and fly. This method works best in deep pools and clearer water. I prefer to use a Thill Ice/Fly bobber when fishing vertically because when the indicator flips from on its side to straight up you know your flies are directly underneath and at the exact depth you want.
This method works best with weighted flies, and/or with enough split shot to keep your fly directly underneath your indicator.
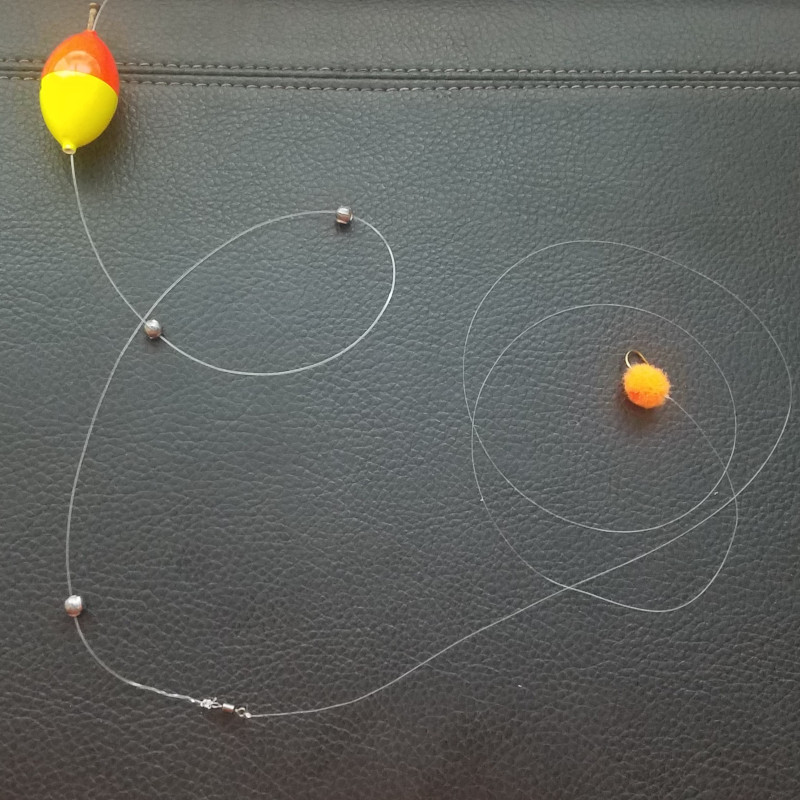
- Rigging: Secure your indicator to your leader and add a few split shot evenly spaced between it and a swivel. The reason for spacing out the split shot is so that each weight helps pull the next weight down and help keep your line straight. Tie on a section of tippet roughly 16 inches long from the swivel to your fly. If you are fishing really deep try using a fly with a tungsten bead.
Pro-Tip: Change Techniques Quickly
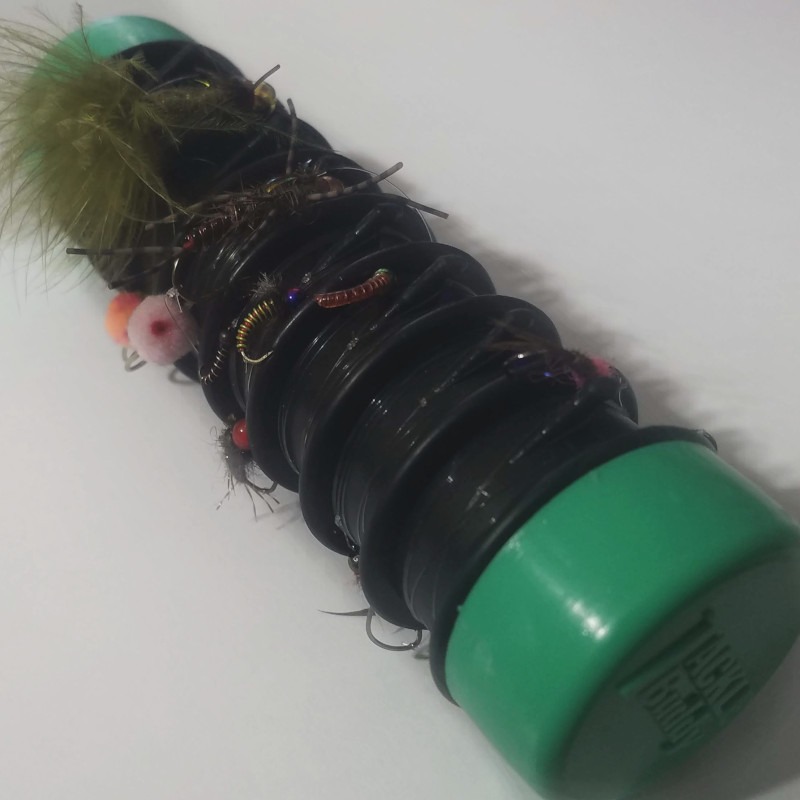
The easiest way to switch between these different techniques is to pre-tie your flies and wrap them on to a lindy rig. Especially on rivers where you can fish two flies. This also comes in handy if you break off a fly or two and don’t want to waste your precious time on the river tying on flies. Try a loop to loop connection or use a no-knot fast snap to quickly snap onto a tippet ring at the end of your leader. My favorite multiple fly holder is the Tackle Buddy. Another good option is using Foam Rig Winders, that you can add to your tippet holder.
Streamer Fishing
Not as common on the north shore, but a very popular technique when fly fishing the Brule River in Wisconsin. You can still use this technique on river mouths and larger north shore rivers.
Swinging Streamers
The basics of swinging streamers include casting a fly at roughly a 45-degree downstream angle and letting your streamer “swing” across the river. This is a great technique to cover lots of water as well as catch aggressive steelhead.
Streamers are often swung with the use of a specific type of two-handed (switch or spey) rod and a (shooting head) fly line that allows you to cast weighted flies across larger rivers
You can easily switch to this technique from a running line nymphing setup. Just remove your leader and add a shooting head, sink tip and tippet.
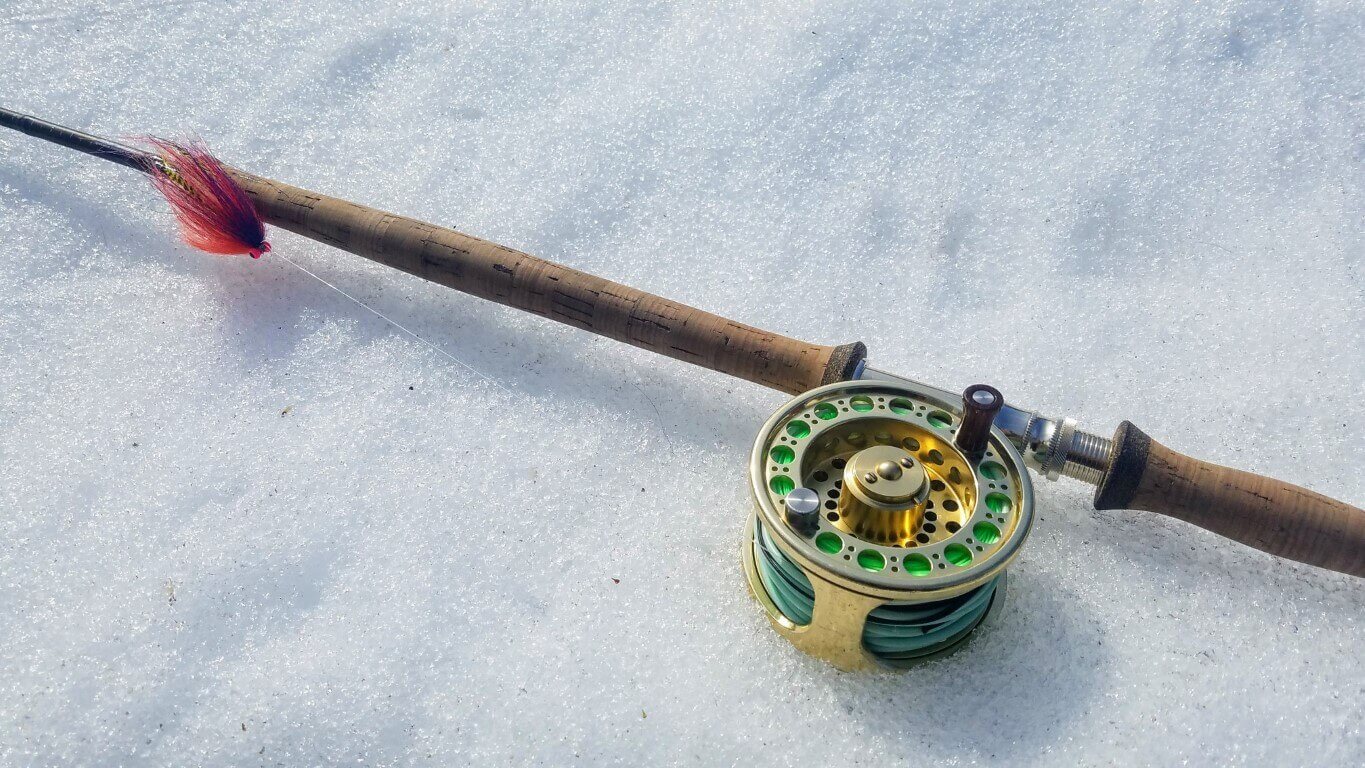
- Rigging: There are endless options for fly lines to use when swinging streamers. The most common setup is backing, shooting line (30-40lb Lazer Line), a shooting head (OPST Commando Head), a sink tip (RIO Mow tips), and a level tippet (usually fluorocarbon) in 10-15 lbs and roughly 4ft long. You’ll want a heavier tippet since fish will often strike a streamer extremely aggressively.
Stripping Streamers
This type of streamer fishing could almost be combined with swinging streamers. At the end of your swing, you should always strip your fly back to you since a fish may have seen your fly and is waiting to strike. However, you can also strip streamers without swinging them first. Especially in slack water and deep pools.
You can use a two hand (switch rod) for this, but your standard 7-8wt 9-10ft fly rod is ideal. The smaller tributaries found on the north shore will allow you to use a standard weight forward line or a sink tip line. If you only have a floating line and want to fish deeper sections or pools I would highly recommend buying a few assorted PolyLeaders. These replace your nylon leader with one that essentially turns your floating line into a sink tip. You can easily switch to this technique from a (fly line) nymphing setup.
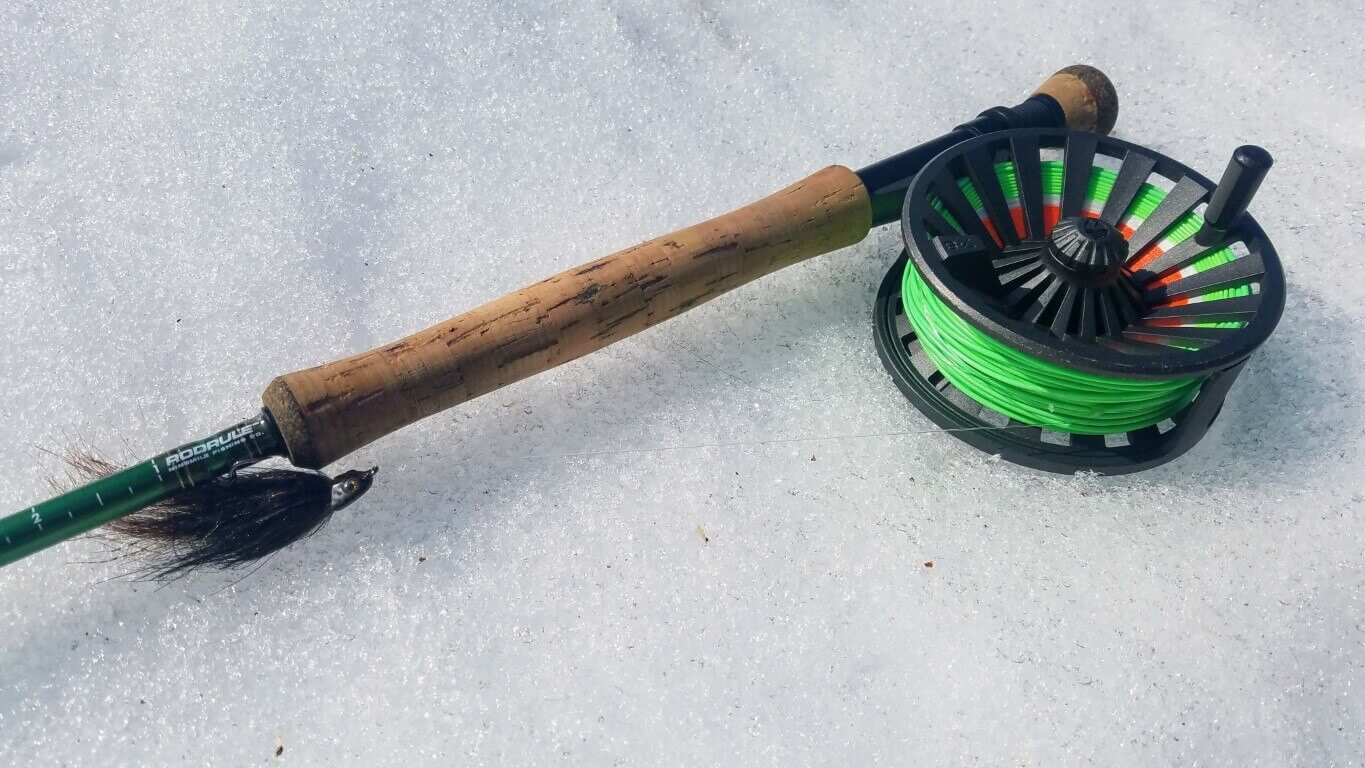
- Rigging: Any weight forward fly line will work, although I prefer floating lines since you can always use heavier flies or add on a PolyLeader to get deeper, it is not as easy to fish full sinking and sink tip lines in shallow riffles and runs. Just like swinging streamers, you will want to use 3-4ft of a heavier tippet (10-15lb) since fish will often strike a streamer extremely aggressively!
That’s it!
Hopefully you learned a few new techniques that will help you catch more steelhead. Now go rig up your rods and hit the water!
If you have a technique that you use that I didn’t mention, feel free to mention it in the comments below, and don’t forget to share!
Share with a friend!
js-outdoors is a free resource for all.
Please consinder donating to keep this site ad-free!


![North Shore Steelheading Techniques [Complete Guide]](/images/lake-superior-steelhead-techniques.jpg)
![How To Tie An Intruder [video]](/images/how-to-tie-an-intruder.jpg)
![Steelhead In The Snow [video]](/images/steelhead-in-the-snow.jpg)
